Affected: SAML SSO, Microsoft Entra ID (formerly Azure Active Directory)
Overview
To display member names in LaunchDarkly, you must configure Microsoft Entra ID to send firstName and lastName attributes in the SAML assertion to LaunchDarkly. This ensures LaunchDarkly can display member names correctly.
Solution
Follow these steps to update the SAML configuration in Microsoft Entra ID:
- Log in to the Microsoft Entra Admin Center.
- Navigate to Enterprise applications, and select the LaunchDarkly SAML app.
- Click Single sign-on.
- In the Attributes & Claims section, click the pencil icon to edit the claims.
- Confirm that the
firstNameandlastNameclaims are present and that the Namespace field is blank. If the claims are missing, proceed to step 7 to add them. - If either claim is present with a namespace, delete and re-create it:
- On the Attributes & Claims page, open the menu next to the claim and click Delete.
- To add or re-create each claim:
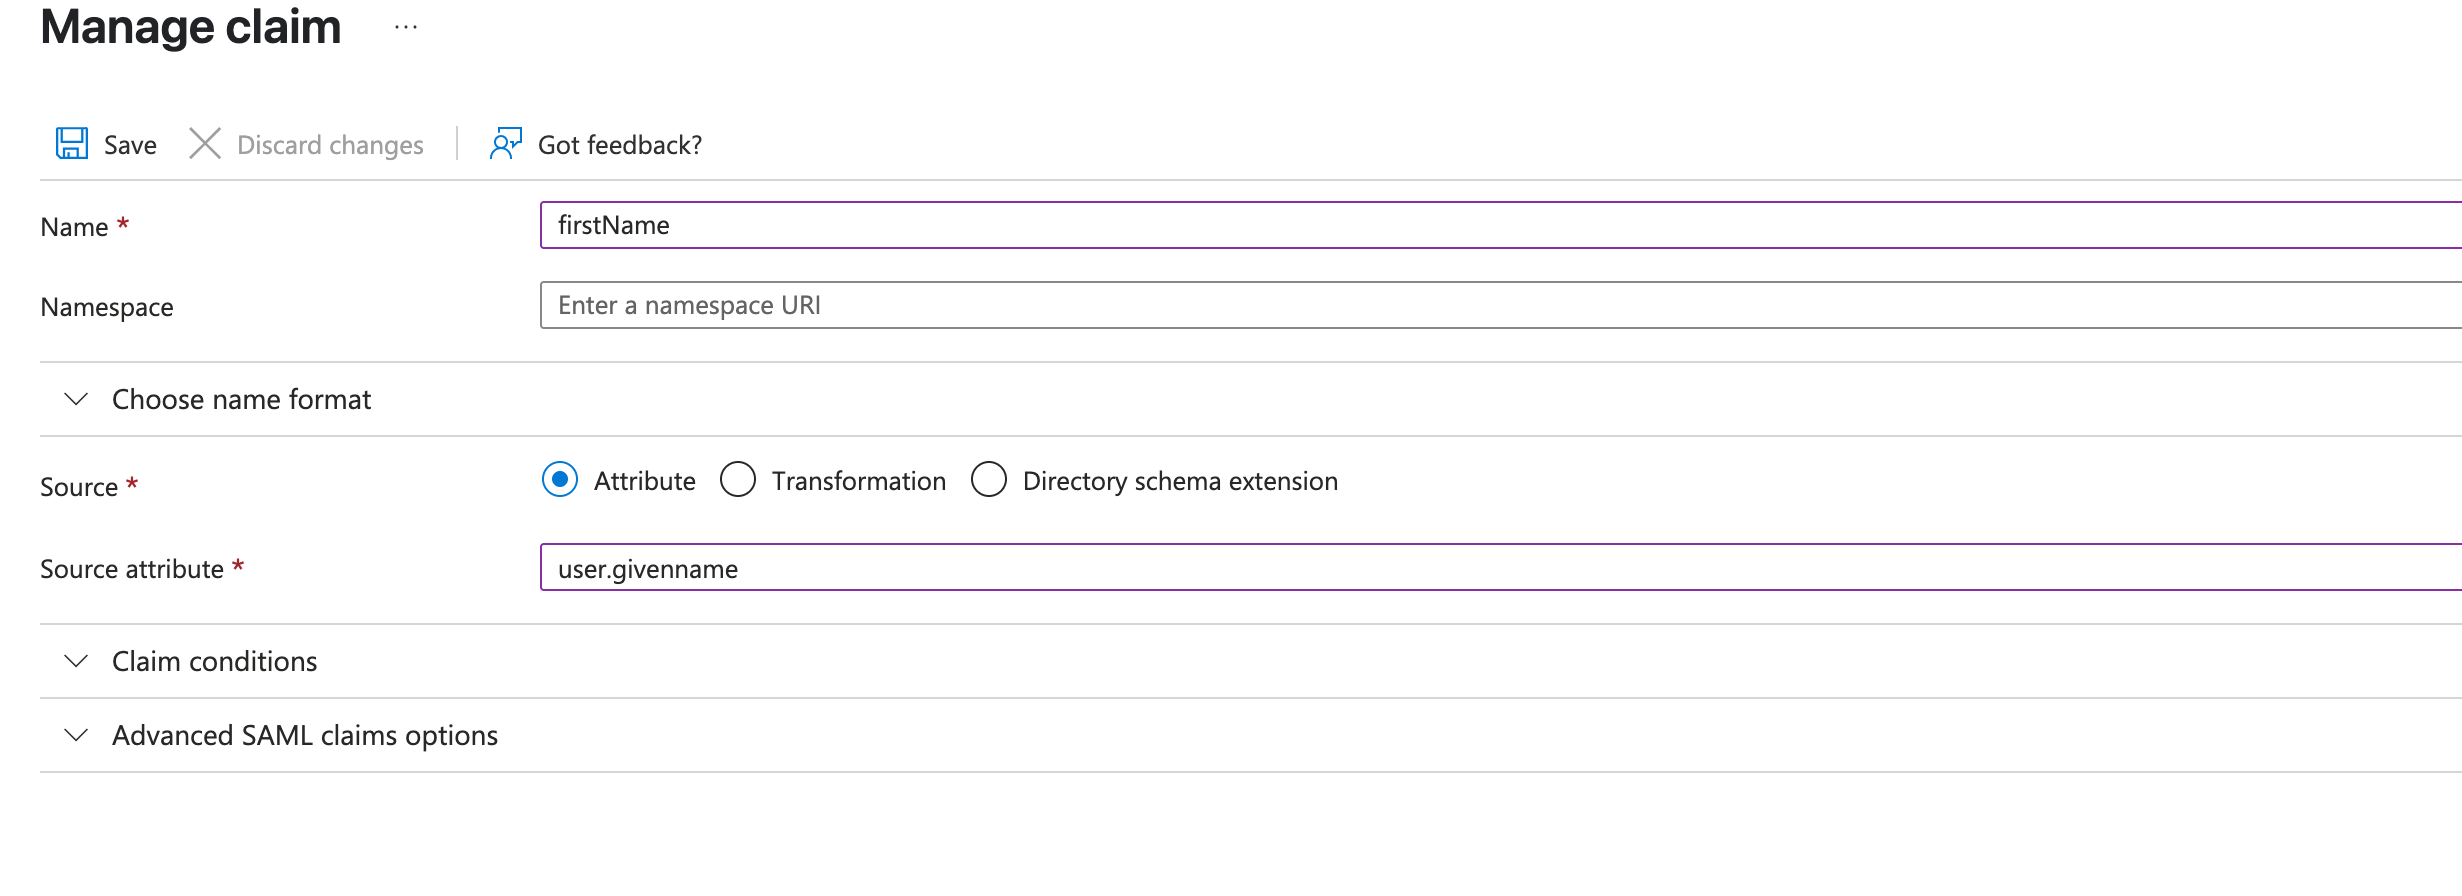
- Click + Add new claim.
- Enter the Name as firstName or lastName.
- Set Source to Attribute.
- For Source attribute, select:
-
user.givenname for
firstName -
user.surname for
lastName
-
user.givenname for
- Leave the Namespace field blank.
- Click Save.
Note: You must repeat this process separately for both firstName and lastName.
-
Log in to LaunchDarkly (or have a test user log in). Verify that the name appears correctly.